参数handlers
1
| app = tornado.web.Application(handlers=[(r"/", IndexHandler)])
|
元组组成的列表
get_argument方法
RequestHandler对象的get_argument方法来捕获请求查询字符串的参数。
1
2
3
4
5
6
| class WrapHandler(tornado.web.RequestHandler):
def post(self):
text = self.get_argument('text')
width = self.get_argument('width', 40)
self.write(textwrap.fill(text, int(width)))
|
http方法
Tornado支持任何合法的HTTP请求(GET、POST、PUT、DELETE、HEAD、OPTIONS)
http状态码
set_status()方法显式地设置HTTP状态码
1
2
3
4
5
6
| class FrobHandler(tornado.web.RequestHandler):
def head(self, frob_id):
frob = retrieve_from_db(frob_id)
if frob is not None:
self.set_status(200)
|
重写write_error()方法在你的RequestHandler类中
1
2
3
4
5
6
7
8
| class IndexHandler(tornado.web.RequestHandler):
def get(self):
greeting = self.get_argument('greeting', 'Hello')
self.write(greeting + ', friendly user!')
def write_error(self, status_code, **kwargs):
self.write("Gosh darnit, user! You caused a %d error." % status_code)
|
Anaconda2和3在windows共存
先正常完全安装好Anaconda2,然后下载Anaconda3,将Anaconda3安装在X:Anaconda2\envs\py3下,3安装时取消勾选Advanced Options的两个复选框。
使用时命令:activate py3
设置虚拟环境(virtualenv)使用python3开发tornado
进入项目目录:G:\Coding\python\durex
activate py3
pip install virtualenv
virtualenv env
env\Scripts\activate
显示如下:
1
| (env) (py3) Administrator@pirogue G:\Coding\python\durex
|
- pip install tornado
项目分层
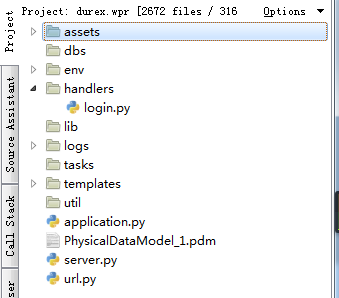
模板绑定
一个简单的server web , 在tornado的单文件py里直接定义settings和url以及url对应的handler映射关系就可以了。
不过在这里将项目分层后,我们也将每部分配置和功能代码分离出来
1
2
3
4
5
6
7
8
9
10
11
12
13
14
15
16
17
18
19
20
21
22
23
24
25
26
27
28
29
30
|
"""
Author: pirogue --<[email protected]>
Purpose: Web服务启动文件
Created: 2017/4/6
Site: http://pirogue.org
"""
import tornado.httpserver
import tornado.ioloop
import tornado.web
import tornado.autoreload
from application import settings
from url import url
from tornado.options import define, options
define("port", default=8888, help="run on the given port", type=int)
if __name__ == '__main__':
tornado.options.parse_command_line()
app = tornado.web.Application(handlers=url, **settings)
http_server = tornado.httpserver.HTTPServer(app)
http_server.listen(options.port)
print('Development server is running at http://127.0.0.1:%s/' % options.port)
tornado.ioloop.IOLoop.instance().start()
|
1
2
3
4
5
6
7
8
9
10
11
12
13
14
15
16
17
18
19
20
21
22
|
"""
Author: pirogue --<[email protected]>
Purpose: URL路由配置文件
Created: 2017/4/8
Site: http://pirogue.org
"""
from handlers import login
url = [
(r"/login", login.LoginHandler),
(r"/", login.MainHandler),
(r"/logout", login.LogoutHandler),
]
if __name__ == '__main__':
unittest.main()
|
1
2
3
4
5
6
7
8
9
10
11
12
13
14
15
16
17
18
19
20
21
22
23
24
25
26
27
28
29
30
31
32
33
34
35
36
37
38
39
40
41
42
43
44
45
46
47
48
49
50
51
52
53
54
55
56
57
58
59
60
61
62
63
64
65
66
67
68
69
70
71
72
|
"""
Author: pirogue --<[email protected]>
Purpose:
Created: 2017/4/8
Site: http://pirogue.org
"""
import tornado.web
from dbs.initdb import Base, engine, DBSession
from dbs.models.users import User
class BaseHandler(tornado.web.RequestHandler):
""" 基础类 """
def get_current_user(self):
""" 获取当前是否存在用户 """
return self.get_secure_cookie("email")
class LoginHandler(BaseHandler):
""" 登录 """
def get(self):
"""Constructor"""
self.render("login.html")
def post(self):
email = self.get_argument("email", None)
pwd = self.get_argument("password", None).encode('utf8')
if email and pwd:
import hashlib
pwd = hashlib.md5(pwd).hexdigest()
if DBSession.query(User).filter(User.email == email,
User.password == pwd).scalar():
self.set_secure_cookie(
"email", email, expires_days=None, httponly=True
)
self.render("index.html")
else:
self.redirect(self.get_login_url(), permanent=True)
else:
self.redirect(self.get_login_url(), permanent=True)
class MainHandler(BaseHandler):
"""后台首页"""
@tornado.web.authenticated
def get(self):
"""Constructor"""
self.render('index.html')
class LogoutHandler(BaseHandler):
""" 退出 """
def get(self):
self.clear_all_cookies()
self.redirect(self.get_login_url())
if __name__ == '__main__':
unittest.main()
|
1
2
3
4
5
6
7
8
9
10
11
12
13
14
15
16
17
18
19
20
21
22
23
24
25
26
27
28
29
30
31
32
33
34
|
"""
Author: pirogue --<[email protected]>
Purpose: 应用配置文件
Created: 2017/4/8
Site: http://pirogue.org
"""
import os
import logging
settings = dict(
debug = True,
template_path = os.path.join(os.path.dirname(__file__), "templates"),
static_path = os.path.join(os.path.dirname(__file__), "assets"),
cookie_secret = "1234567890qwertyuiopasdnghjklzxcvbnm1234567890qwrtyu",
login_url = "/login",
)
logfile = os.path.join(os.path.dirname(__file__), "logs", "app.log")
handler = logging.FileHandler(logfile)
logger = logging.getLogger()
logger.addHandler(handler)
logger.setLevel(logging.NOTSET)
|
python3、tornado、mysql(sqlalchemy)
https://segmentfault.com/a/1190000003856556
- 在Python3下使用tornado和SQLAlchemy实现一个简单的MVC网站
http://blog.csdn.net/xuzhigang_china/article/details/40377679
http://www.cnblogs.com/wswang/p/5826347.html
http://www.cnblogs.com/mosson/p/6071224.html
- Python操作MySQL -即pymysql/SQLAlchemy用法
http://www.cnblogs.com/pangguoping/p/5720322.html
https://www.androiddev.net/python-linux-sqlalchemy/
http://www.codexiu.cn/python/SQLAlchemy%E5%9F%BA%E7%A1%80%E6%95%99%E7%A8%8B/73/529/
SQLAlchemy本身无法操作数据库,其必须以来pymsql等第三方插件,Dialect用于和数据API进行交流,根据配置文件的不同调用不同的数据库API,从而实现对数据库的操作。
1
2
3
4
5
6
7
8
9
10
11
12
13
14
15
16
17
18
19
| MySQL-Python
mysql+mysqldb://<user>:<password>@<host>[:<port>]/<dbname>
python3 已经不支持mysqldb了
pymysql
mysql+pymysql://<username>:<password>@<host>/<dbname>[?<options>]
MySQL-Connector
mysql+mysqlconnector://<user>:<password>@<host>[:<port>]/<dbname>
cx_Oracle
oracle+cx_oracle://user:pass@host:port/dbname[?key=value&key=value...]
更多详见:http://docs.sqlalchemy.org/en/latest/dialects/index.html
|
安装支持:
1
2
3
4
5
6
7
8
9
10
11
12
13
14
15
16
17
18
19
20
21
22
23
| (env) (py3) g:\Coding\python\durex>pip install sqlalchemy
pip install sqlalchemy
Collecting sqlalchemy
Downloading SQLAlchemy-1.1.9.tar.gz (5.2MB)
Building wheels for collected packages: sqlalchemy
Running setup.py bdist_wheel for sqlalchemy: started
Running setup.py bdist_wheel for sqlalchemy: finished with status 'done'
Stored in directory: C:\Users\Administrator\AppData\Local\pip\Cache\wheels\62\c3\8f\12a643439a7ba36143e21533ac633b99da8537b1deb8d0f0c3
Successfully built sqlalchemy
Installing collected packages: sqlalchemy
Successfully installed sqlalchemy-1.1.9
(env) (py3) Administrator@ORZ-HB G:\Coding\python\durex
$ pip install pymysql
Collecting pymysql
Downloading PyMySQL-0.7.11-py2.py3-none-any.whl (78kB)
100% |████████████████████████████████| 81kB 93kB/s
Installing collected packages: pymysql
Successfully installed pymysql-0.7.11
|
SQLAlchemy使用方法
1
2
3
4
5
6
7
8
9
10
11
12
13
14
15
16
17
18
19
20
21
22
23
24
25
26
27
28
29
30
31
32
|
"""
Author: pirogue --<[email protected]>
Purpose: 初始化数据库
Created: 2017/4/12
Site: http://pirogue.org
"""
from sqlalchemy import create_engine
from sqlalchemy.ext.declarative import declarative_base
from sqlalchemy.orm import sessionmaker
DB_HOST = '127.0.0.1'
DB_USER = 'root'
DB_PWD = 'roadfmima'
DB_NAME = 'durex'
Base = declarative_base()
engine = create_engine('mysql+pymysql://%s:%s@%s/%s?charset=utf8' %
(DB_USER, DB_PWD, DB_HOST, DB_NAME),
encoding='utf-8', echo=True,
pool_size=100, pool_recycle=10)
Session = sessionmaker(bind=engine)
DBSession = Session()
|
sqlalchemy.schema包里有数据库关系描述
字段: Column
索引: Index
表: Table
sqlalchemy.types包里有数据类型
二进制: BIGINIT
布尔: Index
字符: CHAR
可变字符: VARCHAR
日期: DATETIME
sqlalchemy.sql包里有操作方法
execute, update, insert, select, delete, join等
1
2
3
4
5
6
7
8
9
10
11
12
13
14
15
16
17
18
19
20
21
22
23
24
25
26
27
28
29
30
31
32
33
34
35
36
37
38
39
40
41
42
43
44
|
"""
Author: pirogue --<[email protected]>
Purpose: 用户关系模型
Created: 2017/4/12
Site: http://pirogue.org
"""
from datetime import datetime
from sqlalchemy import Column, String, Integer, Unicode, TIMESTAMP
from sqlalchemy.orm import relationship, backref
from dbs.initdb import Base, engine, DBSession
class User(Base):
__tablename__ = 'user'
id = Column(Integer, autoincrement=True, primary_key=True)
username = Column(Unicode(50), nullable=False)
email = Column(String(50), nullable=False)
password = Column(String(32), nullable=False)
create_time = Column(TIMESTAMP, default=datetime.now)
def init_db():
Base.metadata.create_all(engine)
def drop_db():
Base.metadata.drop_all(engine)
if __name__=="__main__":
init_db()
print('create user table')
|
python采用pika库使用rabbitmq总结,多篇笔记和示例
http://blog.csdn.net/chenjiebin/article/details/8253433
w3af_api 学习
http://0cx.cc/tag/w3af/
https://pypi.python.org/pypi/w3af-api-client
http://docs.w3af.org/en/latest/api/index.html
切换开发环境到Ubuntu 16.04 LTS + python2
原因windows下开发编译很多Python的第三方库心累,也有部分第三方的工具是用Python2写的,研究并迁移精力有限。
1
2
3
| root@ubuntu:/coding/python/durex# source env/bin/activate
(env) root@ubuntu:/coding/python/durex# pip install pymysql
|
pip时发现异常的慢 囧
在主目录下创建.pip文件夹
然后在该目录下创建pip.conf文件编写如下内容:
1
2
3
| [global]
trusted-host = pypi.douban.com
index-url = http://pypi.douban.com/simple
|
这里以豆瓣的源为例,由于最新的pip安装需要使用的https加密,所以在此需要添加trusted-host
对于window系统来说基本配置相同创建或修改配置文件在%HOMEPATH%\pip\pip.ini
1
2
3
4
5
6
7
8
9
10
| (env) root@ubuntu:/coding/python/durex# pip install sqlalchemy
Collecting sqlalchemy
Downloading http://pypi.doubanio.com/packages/02/69/9473d60abef55445f8e967cfae215da5de29ca21b865c99d2bf02a45ee01/SQLAlchemy-1.1.9.tar.gz (5.2MB)
100% |████████████████████████████████| 5.2MB 3.4MB/s
Building wheels for collected packages: sqlalchemy
Running setup.py bdist_wheel for sqlalchemy ... done
Stored in directory: /root/.cache/pip/wheels/a9/5a/66/2ff71109f1ed14eb4ce8e88eacd8478c0f162bc23f847fe77d
Successfully built sqlalchemy
Installing collected packages: sqlalchemy
Successfully installed sqlalchemy-1.1.9
|
每秒3.4MB,心情舒畅多了~么么
1
| (env) root@ubuntu:/coding/python/durex# pip install tornado
|
安装w3af依赖
1
2
3
4
5
6
7
| sudo apt-get install libxml2-dev libxslt1-dev python-dev
sudo apt-get install zlib1g-dev
sudo apt-get install libevent-dev
sudo apt-get install libssl-dev
pip install pybloomfiltermmap==0.3.14 esmre==0.3.1 phply==0.9.1 nltk==3.0.1 chardet==2.1.1 tblib==0.2.0 pdfminer==20140328 futures==2.1.5 pyOpenSSL==0.15.1 ndg-httpsclient==0.3.3 pyasn1==0.1.9 lxml==3.4.4 scapy-real==2.2.0-dev guess-language==0.2 cluster==1.1.1b3 msgpack-python==0.4.4 python-ntlm==1.0.1 halberd==0.2.4 darts.util.lru==0.5 Jinja2==2.7.3 vulndb==0.0.19 markdown==2.6.1 psutil==2.2.1 termcolor==1.1.0 mitmproxy==0.13 ruamel.ordereddict==0.4.8 Flask==0.10.1 PyYAML==3.12 tldextract==1.7.2
sudo apt-get -y install libyaml-dev git libsqlite3-dev
|
Ubuntu Linux平台下Python集成开发环境Wing IDE无法输入中文的问题
1
2
3
4
5
6
7
8
9
10
11
12
13
14
15
16
17
18
19
20
21
22
23
24
25
| root@ubuntu:~# dpkg -L fcitx-frontend-qt5
/.
/usr
/usr/lib
/usr/lib/x86_64-linux-gnu
/usr/lib/x86_64-linux-gnu/qt5
/usr/lib/x86_64-linux-gnu/qt5/plugins
/usr/lib/x86_64-linux-gnu/qt5/plugins/platforminputcontexts
/usr/lib/x86_64-linux-gnu/qt5/plugins/platforminputcontexts/libfcitxplatforminputcontextplugin.so
/usr/share
/usr/share/doc
/usr/share/doc/fcitx-frontend-qt5
/usr/share/doc/fcitx-frontend-qt5/README
/usr/share/doc/fcitx-frontend-qt5/copyright
/usr/share/doc/fcitx-frontend-qt5/changelog.Debian.gz
root@ubuntu:~# cd /usr/lib/x86_64-linux-gnu/qt5/plugins/platforminputcontexts/
root@ubuntu:/usr/lib/x86_64-linux-gnu/qt5/plugins/platforminputcontexts# ls
libcomposeplatforminputcontextplugin.so libibusplatforminputcontextplugin.so
libfcitxplatforminputcontextplugin.so
root@ubuntu:/usr/lib/x86_64-linux-gnu/qt5/plugins/platforminputcontexts# cp libfcitxplatforminputcontextplugin.so /usr/lib/wingide6/bin/runtime-qt5.5/plugins/platforminputcontexts/
root@ubuntu:/usr/lib/x86_64-linux-gnu/qt5/plugins/platforminputcontexts#
|
框架代码向w3af post数据需要requests库
w3af 安装gui依赖
1
2
3
4
5
6
7
| sudo apt-get -y install python-webkit python-gtksourceview2 python-gtk2 graphviz
pip install xdot==0.6
- PyGTK >= 2.12
- GTK >= 2.12
|
这里遇到一个大坑:
不能在虚拟环境中安装PyGTK和gtk!百度、谷歌了N久。
Install pygtk inside of a virtualenv
1
2
3
4
5
6
7
8
9
10
11
12
13
14
15
16
17
18
19
20
21
22
23
24
25
26
27
28
29
30
31
32
33
34
35
36
37
38
39
40
41
42
43
44
45
46
47
48
49
50
51
52
53
54
55
56
57
58
59
60
61
62
63
64
65
66
67
68
69
70
71
72
73
74
75
76
77
|
if [ "$VIRTUAL_ENV" == "" ]
then
echo "ERROR: not in a virtual environment."
exit -1
fi
CACHE="/tmp/install-pygtk-$$"
mkdir -p $CACHE
echo -e "\E[1m * Checking for cairo...\E[0m"
python -c "
try: import cairo; raise SystemExit(0)
except ImportError: raise SystemExit(-1)"
if [ $? == 255 ]
then
echo -e "\E[1m * Installing cairo...\E[0m"
( cd $CACHE
curl 'http://cairographics.org/releases/py2cairo-1.10.0.tar.bz2' > "py2cairo.tar.bz2"
tar -xvf py2cairo.tar.bz2
( cd py2cairo*
autoreconf -ivf
./configure --prefix=$VIRTUAL_ENV --disable-dependency-tracking
make
make install
)
)
fi
echo -e "\E[1m * Checking for gobject...\E[0m"
python -c "
try: import gobject; raise SystemExit(0)
except ImportError: raise SystemExit(-1)"
if [ $? == 255 ]
then
echo -e "\E[1m * Installing gobject...\E[0m"
( cd $CACHE
curl 'http://ftp.gnome.org/pub/GNOME/sources/pygobject/2.28/pygobject-2.28.6.tar.bz2' > 'pygobject.tar.bz2'
tar -xvf pygobject.tar.bz2
( cd pygobject*
./configure --prefix=$VIRTUAL_ENV --disable-introspection
make
make install
)
)
fi
echo -e "\E[1m * Checking for gtk...\E[0m"
python -c "
try: import gtk; raise SystemExit(0)
except ImportError: raise SystemExit(-1)" 2&> /dev/null
if [ $? == 255 ]
then
echo -e "\E[1m * Installing gtk...\E[0m"
( cd $CACHE
curl 'https://pypi.python.org/packages/source/P/PyGTK/pygtk-2.24.0.tar.bz2' > 'pygtk.tar.bz2'
tar -xvf pygtk.tar.bz2
( cd pygtk*
./configure --prefix=$VIRTUAL_ENV PKG_CONFIG_PATH=/usr/local/lib/pkgconfig:$VIRTUAL_ENV/lib/pkgconfig
make
make install
)
)
fi
|
封装李劼杰的子域名扫描
https://github.com/lijiejie/subDomainsBrute
windows 下pip install esmre==0.3.1
1
2
3
4
5
6
7
8
9
10
11
12
13
14
15
16
17
18
19
20
21
22
23
24
25
26
27
28
29
30
31
32
33
34
35
36
37
38
39
40
41
42
43
44
45
46
47
48
49
50
51
52
53
54
55
| $ pip install esmre==0.3.1
Collecting esmre==0.3.1
Using cached esmre-0.3.1.tar.gz
Requirement already satisfied: setuptools in g:\coding\python\qingteng\crawl\w3af\venv\lib\site-packages (from esmre==0.3.1)
Building wheels for collected packages: esmre
Running setup.py bdist_wheel for esmre ... error
Complete output from command g:\coding\python\qingteng\crawl\w3af\venv\scripts\python.exe -u -c "import setuptools, tokenize;__file__='c:\\users\\admini~1\\appdata\\local\\temp\\pip-build-attjnf\\esmre\\setup.py';f=getattr(tokenize, 'open', open)(__file__);code=f.read().replace('\r\n', '\n');f.close();exec(compile(code, __file__, 'exec'))" bdist_wheel -d c:\users\admini~1\appdata\local\temp\tmpl1xblipip-wheel- --python-tag cp27:
running bdist_wheel
running build
running build_py
creating build
creating build\lib.win-amd64-2.7
copying src\esmre.py -> build\lib.win-amd64-2.7
running build_ext
building 'esm' extension
creating build\temp.win-amd64-2.7
creating build\temp.win-amd64-2.7\Release
creating build\temp.win-amd64-2.7\Release\src
C:\Users\Administrator\AppData\Local\Programs\Common\Microsoft\Visual C++ for Python\9.0\VC\Bin\amd64\cl.exe /c /nologo /Ox /MD /W3 /GS- /DNDEBUG -Ig:\myenv\anaconda2\include -Ig:\coding\python\qingteng\crawl\w3af\venv\PC /Tcsrc/esm.c /Fobuild\temp.win-amd64-2.7\Release\src/esm.obj
esm.c
C:\Users\Administrator\AppData\Local\Programs\Common\Microsoft\Visual C++ for Python\9.0\VC\Bin\amd64\cl.exe /c /nologo /Ox /MD /W3 /GS- /DNDEBUG -Ig:\myenv\anaconda2\include -Ig:\coding\python\qingteng\crawl\w3af\venv\PC /Tcsrc/aho_corasick.c /Fobuild\temp.win-amd64-2.7\Release\src/aho_corasick.obj
aho_corasick.c
src/aho_corasick.c(48) : fatal error C1083: Cannot open include file: 'stdbool.h': No such file or directory
error: command 'C:\\Users\\Administrator\\AppData\\Local\\Programs\\Common\\Microsoft\\Visual C++ for Python\\9.0\\VC\\Bin\\amd64\\cl.exe' failed with exit status 2
----------------------------------------
Failed building wheel for esmre
Running setup.py clean for esmre
Failed to build esmre
Installing collected packages: esmre
Running setup.py install for esmre ... error
Complete output from command g:\coding\python\qingteng\crawl\w3af\venv\scripts\python.exe -u -c "import setuptools, tokenize;__file__='c:\\users\\admini~1\\appdata\\local\\temp\\pip-build-attjnf\\esmre\\setup.py';f=getattr(tokenize, 'open', open)(__file__);code=f.read().replace('\r\n', '\n');f.close();exec(compile(code, __file__, 'exec'))" install --record c:\users\admini~1\appdata\local\temp\pip-lcnnxs-record\install-record.txt --single-version-externally-managed --compile --install-headers g:\coding\python\qingteng\crawl\w3af\venv\include\site\python2.7\esmre:
running install
running build
running build_py
creating build
creating build\lib.win-amd64-2.7
copying src\esmre.py -> build\lib.win-amd64-2.7
running build_ext
building 'esm' extension
creating build\temp.win-amd64-2.7
creating build\temp.win-amd64-2.7\Release
creating build\temp.win-amd64-2.7\Release\src
C:\Users\Administrator\AppData\Local\Programs\Common\Microsoft\Visual C++ for Python\9.0\VC\Bin\amd64\cl.exe /c /nologo /Ox /MD /W3 /GS- /DNDEBUG -Ig:\myenv\anaconda2\include -Ig:\coding\python\qingteng\crawl\w3af\venv\PC /Tcsrc/esm.c /Fobuild\temp.win-amd64-2.7\Release\src/esm.obj
esm.c
C:\Users\Administrator\AppData\Local\Programs\Common\Microsoft\Visual C++ for Python\9.0\VC\Bin\amd64\cl.exe /c /nologo /Ox /MD /W3 /GS- /DNDEBUG -Ig:\myenv\anaconda2\include -Ig:\coding\python\qingteng\crawl\w3af\venv\PC /Tcsrc/aho_corasick.c /Fobuild\temp.win-amd64-2.7\Release\src/aho_corasick.obj
aho_corasick.c
src/aho_corasick.c(48) : fatal error C1083: Cannot open include file: 'stdbool.h': No such file or directory
error: command 'C:\\Users\\Administrator\\AppData\\Local\\Programs\\Common\\Microsoft\\Visual C++ for Python\\9.0\\VC\\Bin\\amd64\\cl.exe' failed with exit status 2
----------------------------------------
Command "g:\coding\python\qingteng\crawl\w3af\venv\scripts\python.exe -u -c "import setuptools, tokenize;__file__='c:\\users\\admini~1\\appdata\\local\\temp\\pip-build-attjnf\\esmre\\setup.py';f=getattr(tokenize, 'open', open)(__file__);code=f.read().replace('\r\n', '\n');f.close();exec(compile(code, __file__, 'exec'))" install --record c:\users\admini~1\appdata\local\temp\pip-lcnnxs-record\install-record.txt --single-version-externally-managed --compile --install-headers g:\coding\python\qingteng\crawl\w3af\venv\include\site\python2.7\esmre" failed with error code 1 in c:\users\admini~1\appdata\local\temp\pip-build-attjnf\esmre\
```
> 到C:\Users\Administrator\AppData\Local\Programs\Common\Microsoft\Visual C++ for Python\9.0\VC\include目录下,创建一个stdbool.h,内容如下:
|
typedef int bool;
#define false 0
#define true 1
```
原文作者: pirogue
原文链接: http://pirogue.org/2017/04/07/durex/
版权声明: 转载请注明出处(必须保留作者署名及链接)